Right Servers Blog
The Ultimate Guide to Website Migration: Tips, Tools, and Best Practices
By Editorial Staff
Website migration is a critical process that involves transferring your website from one hosting environment to another. Whether you’re upgrading your hosting services, moving to a new platform, or rebranding your business, website migration is a complex task that requires careful planning and execution. Done correctly, it can lead to improved website performance, enhanced security, and a better user experience. Done poorly, however, it can result in downtime, data loss, and a negative impact on your SEO rankings.
In this comprehensive guide, we will walk you through the website migration process, providing you with practical tips, tools, and best practices to ensure a smooth transition. This guide is designed to be easy to follow and is supported by visuals to help you understand each step. Additionally, this blog post is part of a broader link tree that connects to other related topics, making it a valuable resource for anyone involved in website management.
What is Website Migration?
Website migration refers to the process of moving a website from one hosting provider or server environment to another. This can involve changes in domain names, site architecture, platform upgrades, or content management systems (CMS). The goal is to transfer all aspects of the website—content, design, databases, and functionalities—without disrupting the user experience or losing valuable data.
Common reasons for website migration include:
- Upgrading to a more powerful hosting provider
- Rebranding your business or changing your domain name
- Moving from one CMS to another (e.g., from WordPress to Joomla)
- Improving website performance and security
- Consolidating multiple websites into one
Types of Website Migration
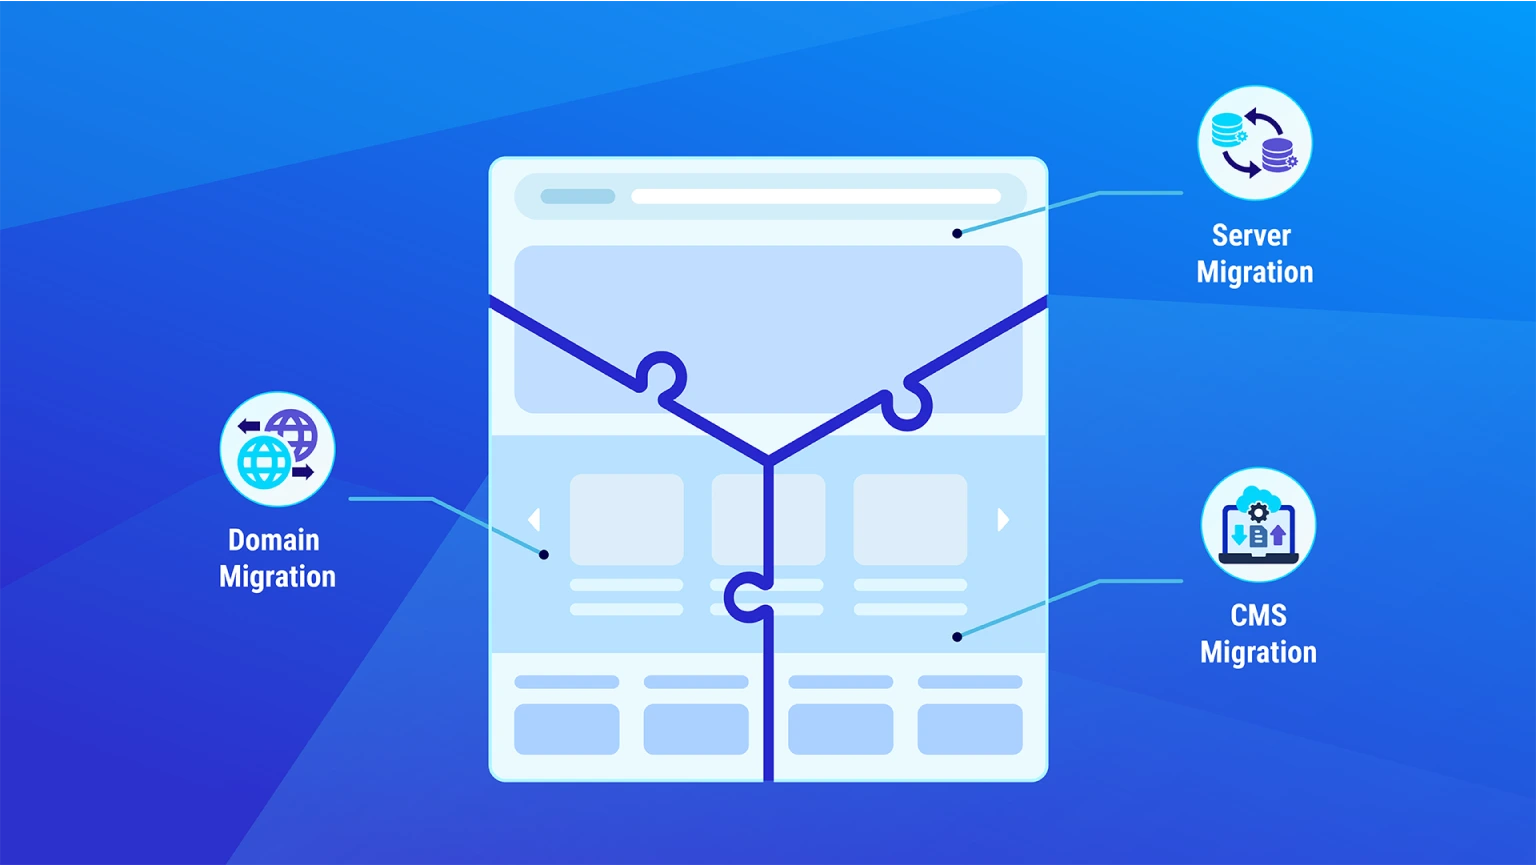
Before diving into the migration process, it’s important to understand the different types of website migration. Each type has its own set of challenges and requirements.
Domain Migration
Domain migration involves changing your website’s domain name. This could be due to rebranding, switching from a non-secure to a secure domain (e.g., from http:// to https://), or moving from a subdomain to a root domain (e.g., from blog.example.com to www.example.com).
Key Considerations:
- SEO Impact: Ensure proper 301 redirects are in place to preserve your SEO rankings.
- URL Structure: Maintain a consistent URL structure to avoid broken links.
Server Migration
Server migration involves moving your website from one server or hosting provider to another. This type of migration is often done to improve site performance, security, or scalability.
Key Considerations:
- Downtime Minimization: Plan your migration during off-peak hours to minimize downtime.
- Data Transfer: Ensure all website files, databases, and emails are transferred securely.
Platform or CMS Migration
Platform or CMS migration involves moving your website from one content management system to another, such as from WordPress to Drupal or from a custom-built site to a CMS.
Key Considerations:
- Data Compatibility: Ensure that your content, media, and metadata are compatible with the new CMS.
- Design and Functionality: Recreate or redesign your website’s layout and functionalities in the new platform.
Structural Migration
Structural migration involves changing the structure of your website, such as redesigning the site architecture, merging multiple sites into one, or significantly altering the URL structure.
Key Considerations:
- Internal Linking: Update internal links to reflect the new structure.
- Sitemap Update: Submit a new sitemap to search engines to help them index your site correctly.
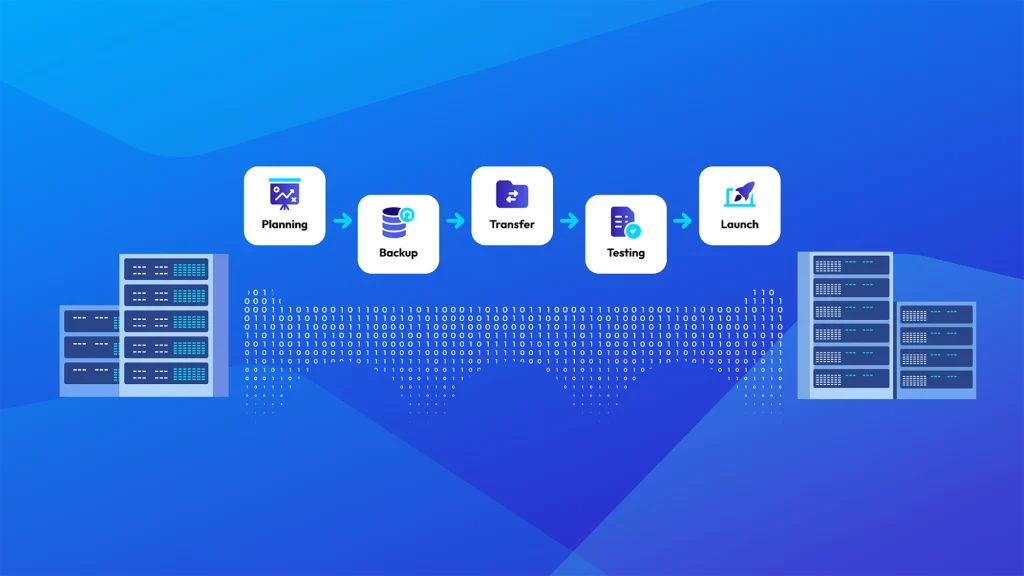
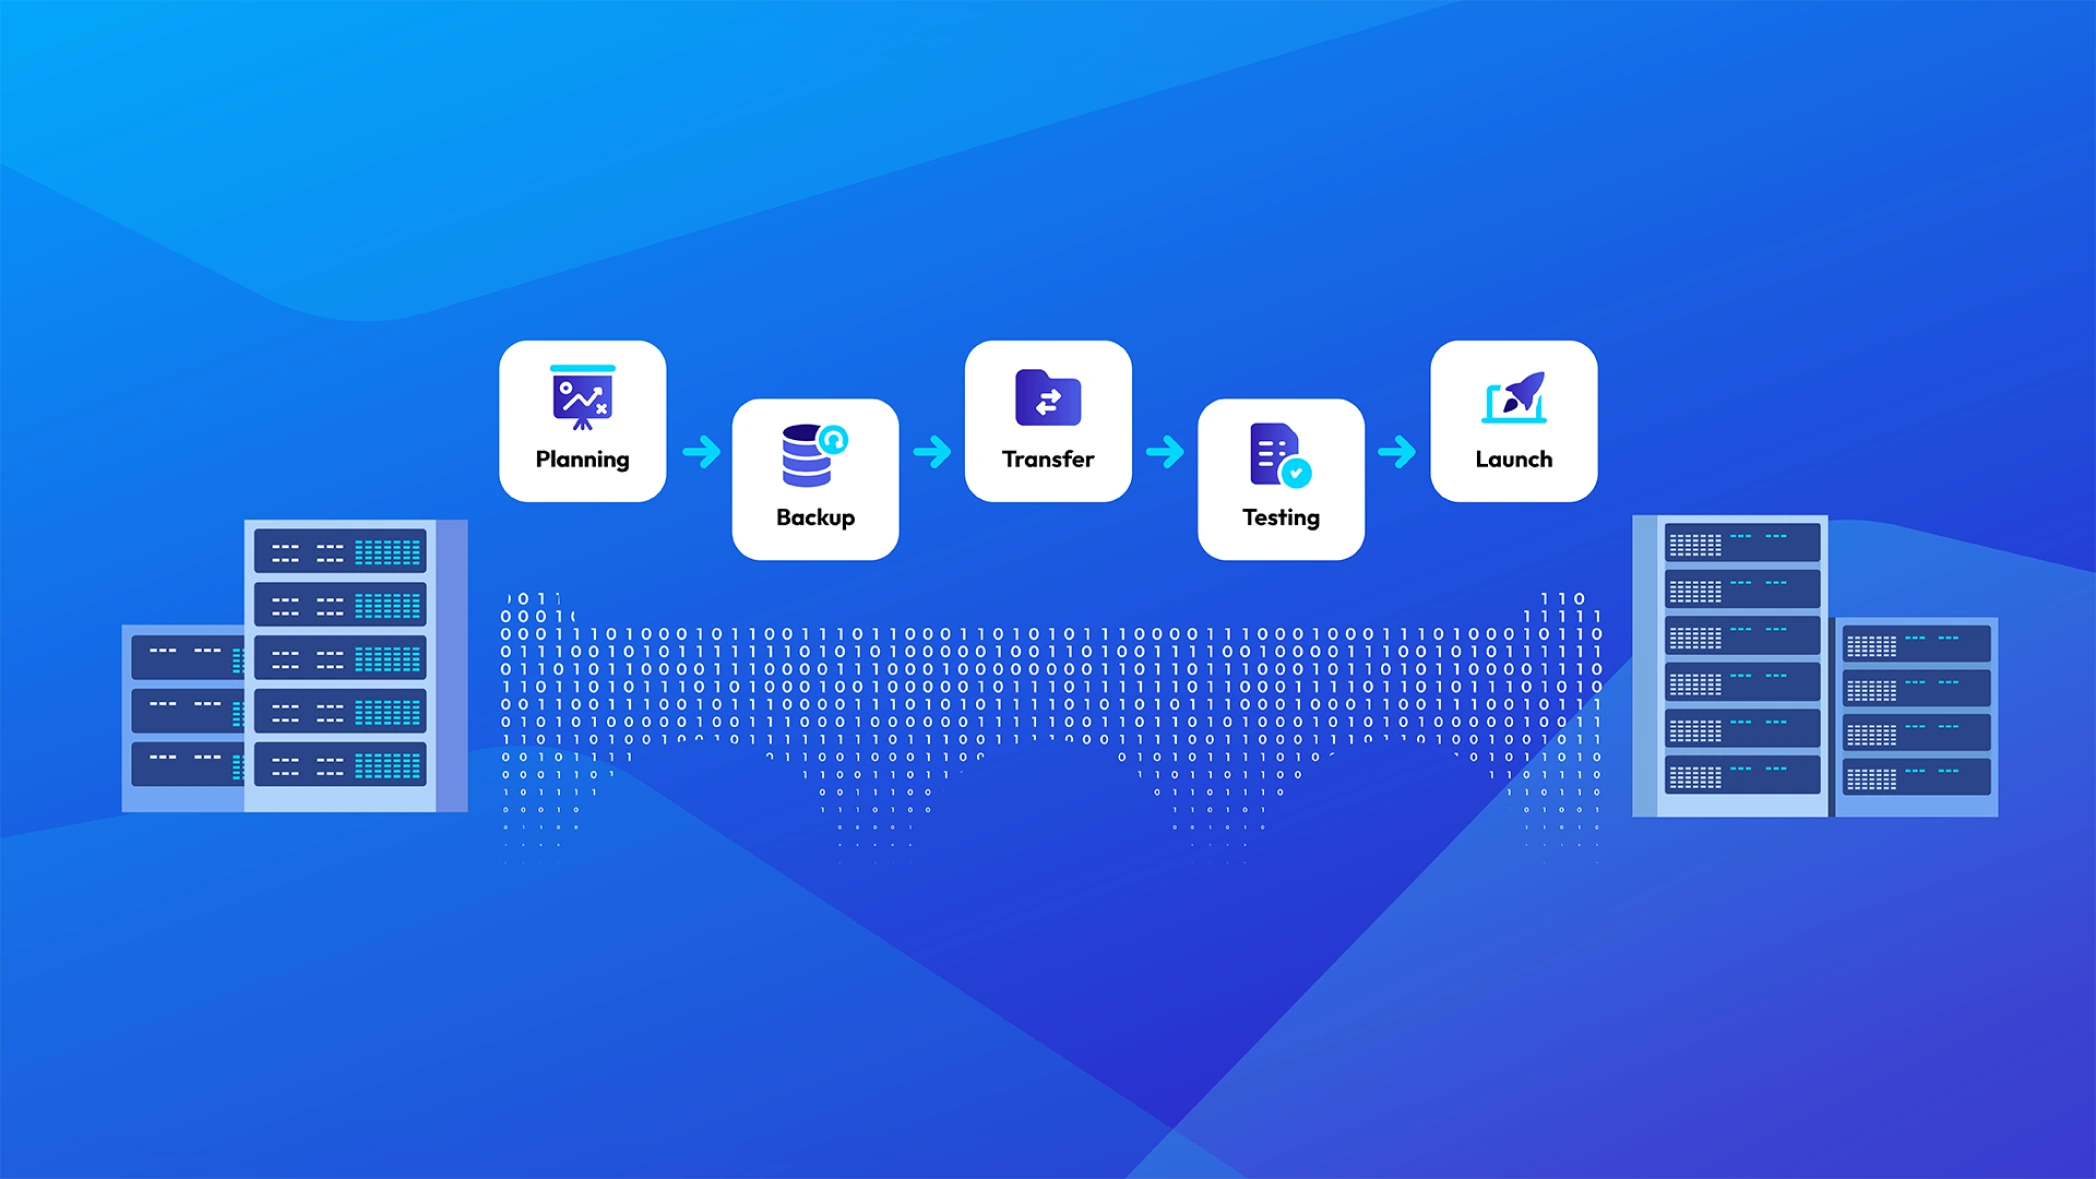
Step-by-Step Guide to Website Migration
Migrating a website can be a daunting task, but with careful planning and the right tools, you can ensure a smooth transition. Below is a step-by-step guide to help you through the process.
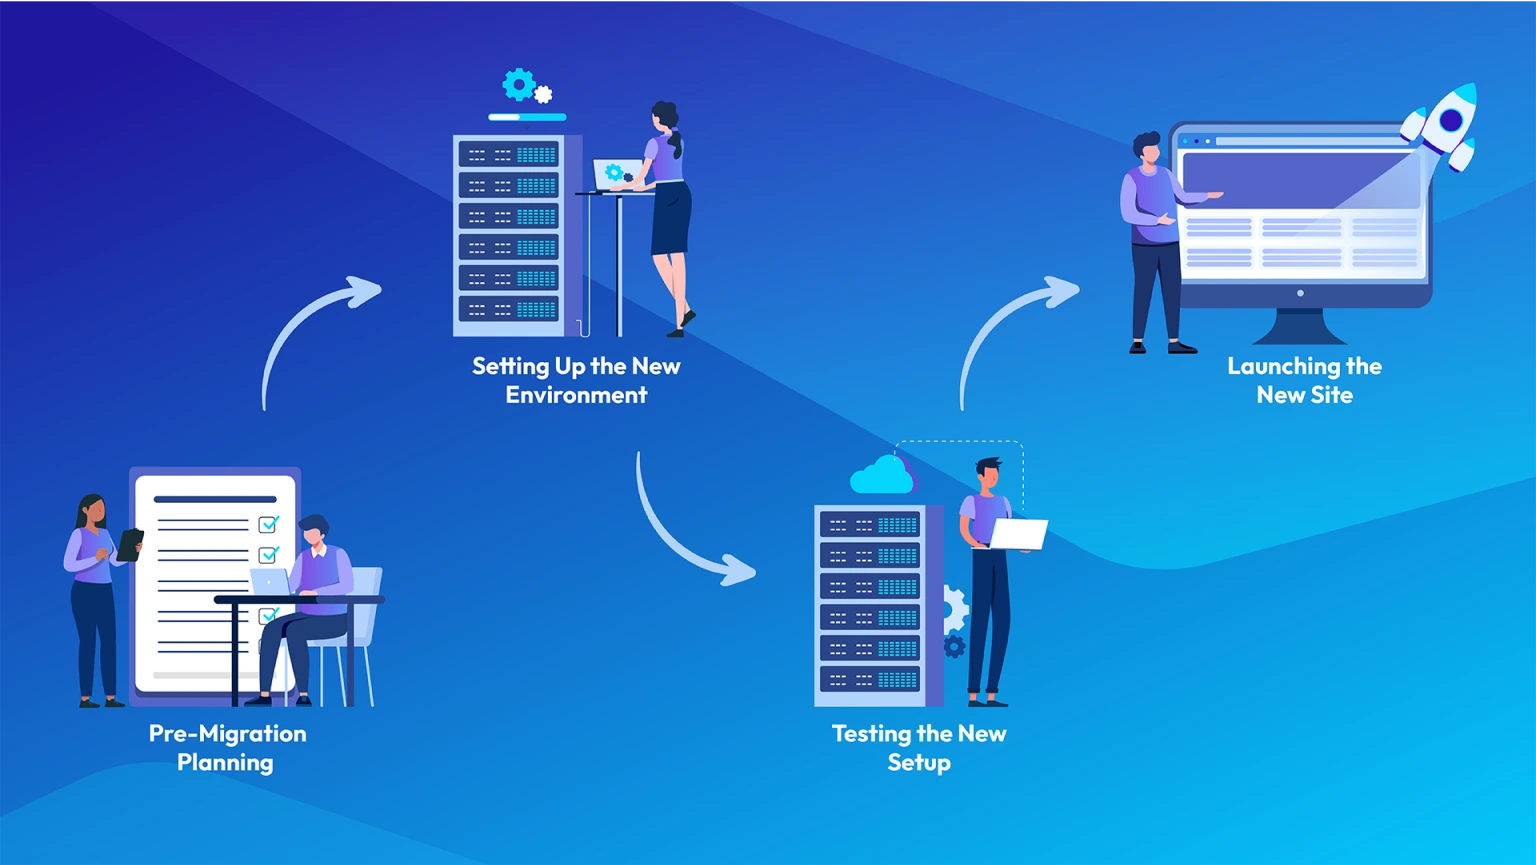
1. Pre-Migration Planning
Create a Backup
Before making any changes, create a full ackup of your website. This includes all files, databases, and content. If anything goes wrong during the migration, you can restore your site from this backup.
Audit Your Current Website
Conduct a thorough audit of your current website to identify all the elements that need to be migrated. This includes content, media files, plugins, themes, and databases.
Choose the Right Hosting Provider
Select a hosting provider that meets your website’s needs in terms of performance, security, and scalability. If your hosting company offers migration services as part of their managed services, consider using them for a hassle-free experience.
Plan the Migration Schedule
Plan your migration during off-peak hours to minimize the impact on your users. Set a realistic timeline that allows for testing and troubleshooting before the new site goes live.
2. Setting Up the New Environment
Plan the Migration Schedule
If you’re migrating to a new server, set up the environment to match your current setup. This includes installing the same software, CMS, and configurations.
Transfer Files and Databases
Use secure methods such as FTP/SFTP or a migration plugin to transfer all your website files and databases to the new server. Ensure that all data is transferred accurately without corruption.
Update DNS Settings
Once the migration is complete, update your domain’s DNS settings to point to the new server. This step is crucial for ensuring that visitors are directed to the new site.
Configure SSL Certificates
If you’re using SSL certificates, ensure they are properly configured on the new server to maintain website security.
3. Testing the New Setup
Test the Website Functionality
Before making the new site live, thoroughly test all aspects of the website. This includes checking for broken links, verifying forms and interactive elements, and ensuring that all content is displayed correctly.
Perform Cross-Browser Testing
Test your website on different browsers and devices to ensure a consistent user experience across all platforms.
Monitor Site Performance
4. Launching the New Site
Final Backup
Before switching over, create a final backup of the old site. This ensures that you have a fallback option if something goes wrong during the launch.
Make the New Site Live
Switch the DNS settings to point to the new server. Depending on your domain registrar, DNS propagation may take anywhere from a few minutes to 48 hours.
Monitor the Site Post-Migration
After the site is live, closely monitor its performance, traffic, and user behavior. Look out for any errors or issues that may arise and address them promptly.
Update Search Engines
Submit the new sitemap to search engines like Google to help them index the new site. This is important for maintaining your SEO rankings and ensuring that your site appears in search results.
Useful Tools for Website Migration

To ensure a smooth migration, there are several tools and resources you can use:
- All-in-One WP Migration (WordPress): A popular plugin for migrating WordPress sites, allowing you to export all your content, files, and databases in one go.
- UpdraftPlus: A comprehensive backup and migration tool for WordPress sites.
- Cloudflare: A CDN and DNS management tool that can help with site migration and minimize downtime.
- Google Search Console: Use this tool to submit your new sitemap and monitor how Google indexes your migrated site.
- Screaming Frog SEO Spider: An SEO tool that helps identify broken links, redirects, and other SEO issues post-migration.
Tip: Always test these tools in a staging environment before using them on your live site to avoid unexpected issues.
SEO Considerations During Migration
Website migration can have a significant impact on your SEO if not handled carefully. Here are some key considerations to keep in mind:
- 301 Redirects: Ensure that all old URLs are redirected to the new URLs using 301 redirects. This preserves your SEO rankings by signaling to search engines that the content has permanently moved.
- Update Internal Links: After migration, update all internal links to point to the new URLs. This helps maintain a logical site structure and avoids 404 errors.
- Check for Duplicate Content: Ensure that the migration doesn’t result in duplicate content, as this can harm your SEO rankings.
- Monitor Traffic: Use Google Analytics to monitor traffic before and after the migration. Any significant drops could indicate an issue that needs to be addressed.
Backlinks to Authoritative Sources:
- Google Search Console: For monitoring and maintaining your website’s presence in Google Search results.
- Google PageSpeed Insights: For analyzing and optimizing your website’s performance.
Conclusion: Smooth Website Migration for Long-Term Success
Website migration is a complex process, but with careful planning, the right tools, and a reliable hosting provider, it can be executed successfully with minimal disruption to your business. Whether you’re moving to a new hosting provider, rebranding, or upgrading your platform, following the steps outlined in this guide will help you achieve a smooth transition while preserving your SEO rankings and enhancing your website’s performance.
For those who find the migration process overwhelming or simply don’t have the time to manage it themselves, our hosting company offers comprehensive website migration services as part of our managed services. We handle everything from pre-migration planning to post-migration monitoring, ensuring that your website remains secure, optimized, and live without a hitch. Contact us today to learn more about how we can assist with your website migration and help your business thrive online.
Was this post about Website Migration: Tips, Tools, and Best Practices helpful?
Experience hassle-free hosting with Right Servers. Our managed services include free site migration, a 30-day money-back guarantee, 24/7 expert support, daily backups, and more—ensuring your transition is smooth and your sites are secure. Whether you’re moving from another provider or starting fresh, we’ve got you covered every step of the way. Get started today by contacting us at sales@rightservers.com or visiting Fully Managed Solutions to explore how our comprehensive services can benefit your business.”
- Website, Tips, Tools, Best Practices, Guide, Migration, Servers, SEO, WordPress, UpdraftPlus, Cloudflare, Google Search Console, Screaming Frog SEO Spider
- Website Migration
- 0 Comments
Related post
Why Backups Are a Must for Your Business: An Essential Guide
In today’s digital age, data is the lifeblood of businesses. Whether you’re running a small startup, a large enterprise, or managing websites for clients as an agency or freelancer.

Hosting Client Websites: A Comprehensive How-to Guide for Agencies and Freelancers
As an agency or freelancer in the digital space, offering web hosting services to your clients can be a lucrative and valuable addition to your portfolio.